Handmade creations to withstand test of time
Mrs. fix-it
As a fairly new mom, there are three words I’ve been dreading. They are “back to school.”
I know, most parents are probably cheering that school is starting, and the boredom children have been complaining about is over. The commercials and advertising are everywhere. I can probably count on two hands the amount of spam mail I get daily, urging me to hurry up and buy their door buster deals or to buy every $5 T-shirt they have in stock.
It’s different for me, though. This is my first rodeo. I have one going into kindergarten, and, yes, I’m your stereotypical mom who’s sending their firstborn off to school for the first time … completely a mess. That’s another story for another day, though.
I also have another one who is going to go to preschool for two days a week. For my daughter, this will be a welcomed adventure for her. Having a schedule and classmates of her own is going to be a perfect change of pace for her this upcoming year.
Now that I have the backpacks purchased, the lunch boxes ready to go, school supplies collected and most of the back-to-school clothes hung in the closets, there’s not much left for me to do.
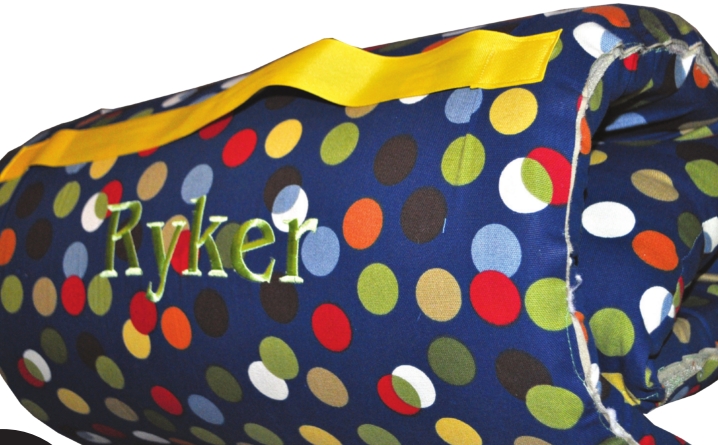
One project I did want to complete for my incoming preschooler was to sew a nap mat for her. I did this for my son when he was about 3 years old, and although my sewing skills are still those that can be improved upon, I am proud of how they turned out, and I’m even more proud they are both original creations. Hopefully, both children will cherish them as much as I do.
There are plenty of tutorials out there that will walk you through a step-by-step process for creating your child’s own nap mat, and I found one that was fairly easy to follow. The tutorial I found was from Jenny Garland’s blog http://jennygarland. typepad.com/jenny_garland/. Once you enter the website, there’s a link on the right side of the page that will take you directly to a nap mat tutorial.
There are many choices for fabric, and a trip to our local Joanne’s had me a little overwhelmed by all the colors, patterns and textures. I chose a more durable fabric that would withstand a little more wear and tear and could be cleaned easily. It was also 40 percent off so that was a big bonus as well. My tip for beginning this project is to go to your fabric store with your shopping list in hand. I purchased everything but the foam insert in one shopping trip. Total estimated cost for this project is around $60.
Once I had all my materials on hand, I could begin sewing. I am a beginner seamstress so there’s been a lot of learning along the way. For example, I’ve had issues with a bobbin that kept jamming and spitting out wads of thread. After watching a few YouTube tutorials and skimming through my owner’s manual, I was able to fix the problem. I think initially I was scared of my sewing machine. I’m a perfectionist so if I’m going to do something, it has to be perfect and usually in the first try. I’ve discovered one will learn the most about a machine through practicing. I have plenty of scrap pieces of fabric I practice on. Sometimes, it’s also best to just step away from your project for a while when you’ve hit a roadblock. I’ve done that plenty of times, too.
This project is fairly easy and definitely a project that any beginner seamstress can tackle in an afternoon. Mine was completed in about two days keeping in mind I had an 18-month-old who thought she could “help,” too, so that prolonged the process.
To make our nap mats more personalized and unique, I had the children’s names monogrammed on them. Another side note, the tutorial I followed suggested using a foam insert for the main part of the nap mat. However, these are fairly pricy at most craft/sewing stores.
Another cheaper option you could try would be to use the plastic nap mats that they sell where you find most school supplies. You can always cut it down to size if it doesn’t fit inside your nap mat.
I think the most special thing about this project to me is that it’s unique. It’s handmade with love and something that could maybe be kept as a keepsake. This project brought up old memories from when I made one for my son three years ago. We brought out his old nap mat that hasn’t been used in a while, and it brought back all kinds of fond memories for all of us. My son enjoyed pretending to take a nap in it again; my daughter is more than eager to have one all to herself!
Sara Thomas is Mrs. Fix-it.
She is originally from Louisiana and is a mother of two, Ryker and Reese. Her husband, Jason, was born and raised in Texas and very proud of that. Email Sara at [email protected].
