Olives
FOOD | Julianne Glatz
I’m addicted to farmers markets. (Is there a 12- step program for that?) Season allowing, they’re high on my must-visit list wherever I travel. In Mediterranean countries the most fascinating display almost always belongs to the olive vendor. There can be as many as two dozen or more bins containing olives in shades of pale yellow to the deepest black, from tiny Spanish arbequina and French niçoise to gigantic Italian specimens that can be green, black or bright red; simply cured or fermented, or in a host of marinades and flavorings. I was excited to find olive bars at Whole Foods groceries and would bring home a variety whenever in St. Louis or Chicago. The display contained numerous types, though not nearly as many as those at European farmers markets, as well as items such as roasted red peppers, marinated garlic cloves and tiny pickled cornichons (cucumbers). Everything was the same price, allowing customers to combine their choices in full or half-pint containers.
Locally, the Montvale Schnucks introduced an olive bar in their remodel a few years back. Though it’s not as big as Whole Foods, there is a nice variety; I especially like the mixed Greek olives with pits. Hy-Vee also has an olive bar, albeit with a still smaller selection; curiously, on my last visit, only green olives in various guises were available.
Olives have been eaten by humans for a long time: at least 5,000 to 6,000 years along the eastern Mediterranean coast. Ancient tombs from that era, the early Bronze Age, have contained written tablets and wood fragments that refer to their consumption and the clincher: olive pits.
There are three primary types of edible olives:
Green olives are picked when they are full size but before ripening has begun. They come in shades of green to yellow.
Semi-ripe olives are picked at the beginning of their ripening cycle, as the color begins to change from green to multiple shades of red into brown. Unlike ripe olives, only the skin has colored; their flesh still lacks pigmentation.
Black/ripe olives are picked when fully ripe and come in shades of purple to brown to black.
Olive fruits in their natural state are unpleasantly bitter. Traditionally, they have been cured and fermented to make them palatable. The process can take several months. The exception is “California-style” which uses a lye solution to make them edible in a few days. The lye produces bland black olives, usually canned, and most familiar to Americans.
Except for salt curing, all other curing methods require fermentation with (beneficial) bacteria and yeasts which play a critical role in the final product. In addition to leaching out the olives’ bitter compounds, they produce favorable metabolites such as organic acids, probiotics, glycerol and esters.
This recipe first appeared
in Heloise’s syndicated newspaper column decades ago. (For those too
young to remember, Heloise answered household questions and offered
tips, but rarely dealt with recipes and cooking.) It was an instant
favorite with my mom and grandmother although they preferred using
peanuts instead of pecans, with which Springfield tearooms had made it.
It’s retro, for sure, but just as delicious as ever and still a family
favorite, one of my go-to recipes for hors d’oeuvres or a simple
sandwich.
Olive nut spread
• 6 ounces cream cheese, softened
• 1/2 c. mayonnaise
• 1/2 c. toasted, chopped pecans
• 1 c. chopped, pimento-stuffed green olives, drained
• 2 T. olive juice, from olive jar
• Freshly ground pepper to taste Combine all ingredients and refrigerate several hours to firm the mixture.
Keeps refrigerated for several weeks. Makes approximately 2 cups.
Even
if there isn’t as large a selection of olives in various marinades in
Springfield as in Mediterranean countries or even Whole Foods, it’s fun
to make your own. This is a good one, but don’t be afraid to experiment.
You could replace the fennel seed with cumin and substitute lemon peel
for the orange. Maybe add some strips of roasted red pepper…
Orange fennel olives
• 3 c. olives: Kalamata, other black olives or a combination of black and green olives
• 1 1/2 c. thinly sliced red onion
• 1 1/2 tsp. salt, divided
• 1/2 tsp. cracked peppercorns or more to taste
• 2 large oranges
• 1 1/2 tsp. fennel seeds
• 4 cloves garlic, thinly sliced
• 2/3 c. red wine vinegar, NOT balsamic
• 1/4 c. sugar or to taste If the olives have pits, crush them very
lightly with your palm to absorb the marinade. It’s not necessary if the
olives are pitted.
Put the sliced onion in a saucepan, add a teaspoon of salt and water to cover. Bring to a boil for 1 minute, then drain.
Peel
the oranges in large strips with a peeler. Remove any white pith by
slicing it off horizontally with a sharp knife. Juice the oranges.
Return
the onion to the pan and add peels, the remaining 1/2 teaspoon salt,
peppercorns, fennel seeds, sliced garlic, vinegar and sugar. Add just
enough orange juice to barely cover the onions, reserving the rest for
another use.
Bring the mixture to a boil, reduce the heat and simmer for four minutes. Remove from the heat and stir in the olives.
Let
come to room temperature, then refrigerate in a non-corrosive
container. The olives should marinate for at least 24 hours before
serving. They will keep, refrigerated, for several weeks.
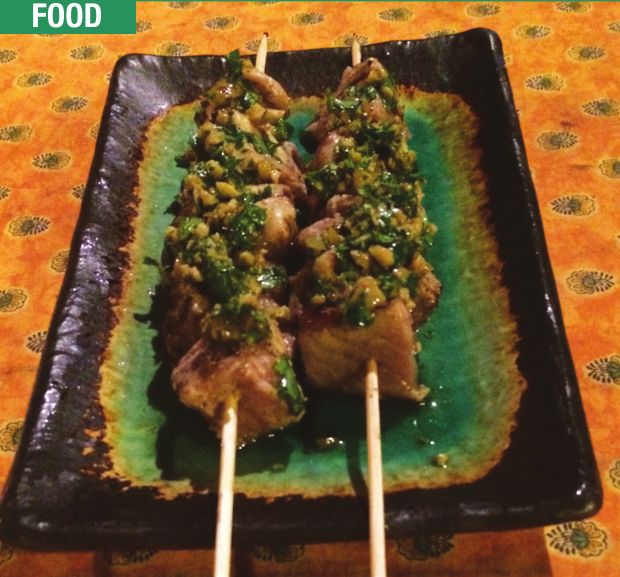
This
recipe hails from Spain. It equally makes a wonderful tapa (small
plate) served with a variety of others, or as an entrée. The olive sauce
is even better if made a day ahead.
Grilled tuna kebabs with green olive sauce
• 1 lb. fresh tuna
• Kosher or sea salt and freshly ground pepper
• 1 large lemon
• 8 T. extra-virgin olive oil, divided
• 4 garlic cloves, minced, divided
• 1-2 anchovy fillets, packed in oil or 1 tsp.
• anchovy paste, optional
• 1/2 c. pitted and chopped Spanish green olives
• 1/2 c. minced parsley, preferably flat-leafed
• 1 T. sherry vinegar, preferred or wine vinegar or more or less to taste
• Sugar to taste, optional
• Hot pepper flakes, optional Cut the tuna into 1-inch to ¾-inch
chunks. Sprinkle with the salt and pepper and let stand while preparing
the marinade.
Peel the
lemon with a vegetable peeler, being careful to leave as much of the
bitter white pith as possible. Mince enough of the peel to measure 1
teaspoon and set aside. Cut the remainder of the peel into 1-inch
pieces.
Place the lemon peel pieces, 2 tablespoons of the olive oil and half
the minced garlic in a large, resealable plastic bag. Squish the
contents around to combine, then add the tuna. Squish out as much air as
possible, seal the bag, and gently toss to thoroughly coat the tuna
with the marinade. Let stand at least 2 hours and up to overnight,
refrigerating if not using in 2 hours.
To
make the sauce: Combine the minced lemon peel and the remaining minced
garlic in the container of a food processor. Add the anchovy, if using,
as well as the olives, parsley and sherry vinegar. Turn the machine on
and immediately add the remaining olive oil, then pulse until the
mixture is finely chopped/ coarsely pureed. Be careful that it does not
turn into a paste. Alternatively, finely mince the solid ingredients by
hand and then stir in the vinegar and oil. Season to taste. It is
unlikely that additional salt is needed, but you may wish to add some
black pepper, hot pepper flakes and/or a little sugar. Let stand at
least 1 hour to develop the flavors.
Preheat
the grill. Thread the tuna onto skewers. Grill to the desired degree of
doneness. Traditionally, Spaniards grill tuna until cooked through, but
still juicy. I prefer it medium–medium/rare.
Serve the kebabs topped with the sauce or on the side. Serves 4–8.
Note: This method and sauce is also excellent with tuna steak and pork chops.
Contact Julianne Glatz at [email protected].
