For centuries people have
made cakes to mark special occasions. These confections have evolved
from rough, yeast-leavened cakes made by Romans to more elaborate,
layered pastries created by 16 th -century German bakers, which
resembled what is often served today. Since the 1930s when they were
introduced, boxed cake mixes have become so prevalent that generations
of home bakers have never learned how to make a simple cake from
scratch. And convenient as those mixes may be, nothing compares with the
flavor of real eggs, butter and flour.
If
you’ve never made a “from scratch” cake, let this be your invitation.
With these userfriendly tips, you’ll find that baking a cake can be as
fun and easy as it is delicious.
1. Read the recipe all the way through and assemble your ingredients. This
is sound advice when starting on any culinary project, but especially
when baking. It’s frustrating to get halfway through a recipe, only to
realize that you’re missing an ingredient. Likewise, taking the time to
assemble your utensils, equipment and pans will streamline the process.
2. Let your ingredients come to room temperature. When making cake batter – unlike biscuit and pie dough – ingredients
need to be at room temperature. Most modern cake recipes start with
whipping (or “creaming”) softened butter and sugar to incorporate air
into the batter. If you then add fridge-cold eggs, they will cause the
fat in the butter to harden, and the batter won’t properly emulsify. If
you’re the type to plan ahead, simply set your measured ingredients on
the counter for an hour. More impulsive bakers can accelerate things by
cracking eggs into a small bowl set inside a larger bowl of warm tap
water and waiting about 5 minutes. You can warm other ingredients in a
microwave on low power, being careful not to melt butter or overheat
liquids. Remember, you want them to be room temperature, not hot.
3. Use parchment for pan release. Parchment
paper is one of my baking essentials. Use a pencil to trace the bottom
of your cake pan onto the parchment, cut with scissors and place in your
greased cake pan. This almost guarantees your cake will turn out
beautifully, not half-stuck to the bottom of the pan.
You
can use a commercially made baking spray, but I like this easy, DIY pan
release. Mix equal parts soft butter, flour and vegetable oil and store
in a wide-mouth Mason jar in the fridge. Any time you need to grease
baking pans or casserole dishes, you’re set. This works especially well for Bundt pans with elaborate detailing.
 4. Measure (or weigh) and mix flour correctly. Modern flour doesn’t need to be sifted, but it should be
whisked. Flour scooped out of a bag with a measuring cup can weigh
several ounces more than sifted flour. This is why it is always more
accurate to weigh baking ingredients rather than measure them by volume.
4. Measure (or weigh) and mix flour correctly. Modern flour doesn’t need to be sifted, but it should be
whisked. Flour scooped out of a bag with a measuring cup can weigh
several ounces more than sifted flour. This is why it is always more
accurate to weigh baking ingredients rather than measure them by volume.
Combine
and whisk dry ingredients before adding them to the liquid ingredients.
This ensures that the salt, baking powder and other ingredients are
evenly distributed without having to over-mix.
5. Use a scale for even layers. Use a baking scale when pouring batter into the pans to ensure that the layers will be even.
6. Freeze it. Wrapped
well in plastic wrap, cake layers will freeze beautifully for about a
month. I always make cake layers and freeze them ahead, mostly to
lighten my prep load with planning a celebration meal, but also because
it makes the cake layers so much easier to work with. Even large sheet
cake layers can be maneuvered easily once they are frozen hard.
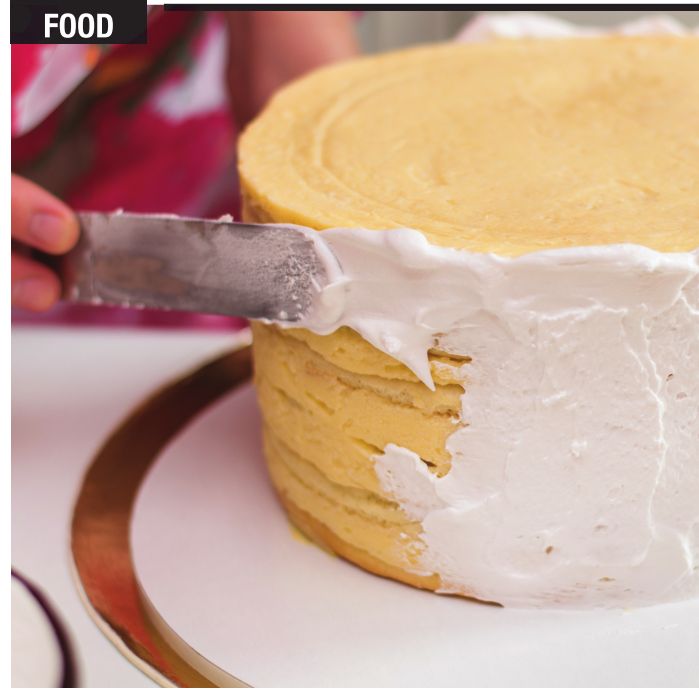
7. Frost it. Fill
a piping bag or zip-close bag with icing (my favorite recipe is below)
and pipe a dollop onto the center of your cake plate. Place parchment
paper triangles where the perimeter of the cake will sit, then place
your first layer, smoothest side down, in the middle of the plate. If
you are going to
use a filling such as jam or fresh fruit in the layers, pipe a dam of
icing around the perimeter of the cake layer to contain the filling.
Once all the layers are assembled, pipe a blob of icing on the top, then
use an offset spatula to smooth a thin layer on the top and sides of
the cake. This “crumb coat” prevents specks of crumbs from contaminating
the top layer of icing. Pop the cake into a fridge or freezer for 30
minutes to harden, then apply the final layer of icing. A revolving cake
stand or Lazy Susan helps achieve a smooth surface.
8. Relax. The
charm of a homemade cake is only enhanced by its imperfections. Present
your cake proudly, even if your attempt at writing “Happy Birthday” is a
little squiggly or if the cake leans slightly to one side. A cake made
with love and real butter beats a “perfect” store-bought cake any day.
Vanilla Birthday Cake
• 1 cup unsalted butter, at room temperature
• 1¾ cup sugar
• 3 cups cake flour
• 1 tablespoon baking powder
• ½ teaspoon salt
• 4 large eggs, at room temperature
• 1¼ cup milk, at room temperature
• 2 teaspoons vanilla extract
• ½ teaspoon almond extract
Preheat oven to 350 degrees. Prepare two 9-inch cake pans with pan release and parchment paper.
Combine flour, baking powder and salt in bowl and whisk. Set aside.
Cream
butter and sugar in a mixer until fluffy. With the mixer running, add
eggs one at a time. Scrape down the bowl, start the mixer, add the
milk/extracts and flour alternately in thirds. Divide the batter between
the pans and bake 30-35 minutes. Cool completely before freezing or
icing.
Swiss Meringue Buttercream
• 5 egg whites
• ¼ teaspoon salt
• 1¼ cup sugar
• ¼ teaspoon cream of tartar
• 1 teaspoon vanilla
• 1 pound butter (softened)
• 9 ounces melted chocolate, cooled (for chocolate frosting, optional)
Combine
the egg whites, sugar, salt and cream of tartar in a clean mixing bowl
and place over a pot of simmering water. Whisk constantly until the
mixture is foamy and has reached 180 degrees (it should be hot to the
touch). Immediately transfer to a mixer and whip on high until the
meringue forms stiff peaks and the mixture has cooled to room
temperature. With the mixer on medium speed, add butter one tablespoon
at a time. When all the butter is incorporated, add the vanilla (and
melted chocolate, if using). This icing is very stable, freezes and
pipes beautifully.
Contact Ashley Meyer at [email protected].
