FOOD | Julianne Glatz
Looking for gifts for the cooks on your list? Here are four recommendations. All are in constant use in my kitchen, and implements I frequently give as gifts.
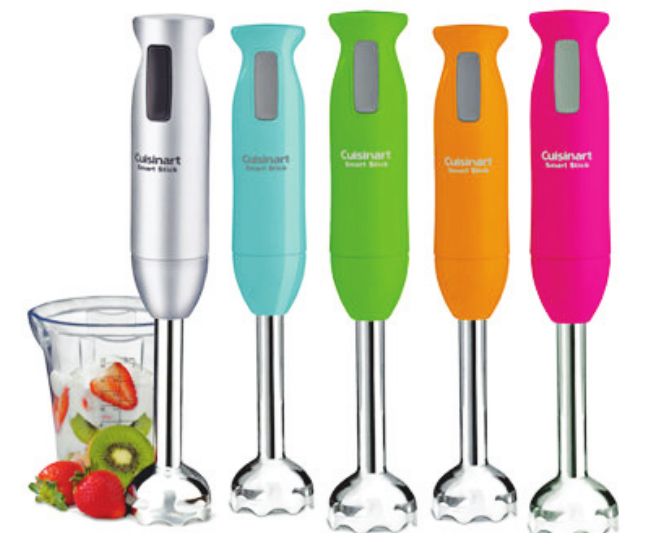
Immersion blenders
“I never thought I’d use one,” the woman told me. On a vegetable-heavy diet –“2 cups a day!” – she wanted alternatives to stirfrying. My suggestions included puréeing vegetables like broccoli and carrots into thick, satisfying soups. But she didn’t have a blender or food processor and didn’t want to spend much.
Unfortunately, I didn’t think of recommending an immersion blender. I’m aware that some folks don’t like or haven’t time to cook. But I’ve used blenders since childhood; I and can’t imagine life without one. Currently I have three food processors (small, medium and large) and a conventional blender. And I have an immersion blender.
In a New York Times 1998 article, Amanda Hesser writes, “Someone who hates washing dishes must have conceived the idea for the immersion blender. Bringing the blender to the pot rather than transferring the pot’s contents into the blender saves a lot of dishes. No wonder immersion blenders have been a hit with home cooks. Once we discovered pumpkin soup could be thinned to a silky puree right in the pot there was no going back.”
Immersion blenders meant for home cooks are stick-like appliances about a foot long. The handle and control button are on one end; on the other a (shielded) rotating blade. Immersed partway into a container of purée-able ingredients, the blade’s action basically creates a whirlpool, drawing in contents that can be blended until partially or completely smooth.
It doesn’t perform such functions as grating or slicing, although some models have attachments for whisking and chopping. But it’s invaluable for puréeing directly in the pan or container, especially because it can be used at the stove. It also blends hot food without the risk an explosion out of a blender or food processer.
Hesser (the NYT food writer who famously came to dinner in the book and movie, Julie and Julia) says manufacturers have greatly improved the power and convenience of home models. (Professional versions, in use since the 1960s versions are heavy and huge.) Home models start at around $20 for a basic corded model to upwards of $100 for cordless versions with attachments. Though I’ve long thought I’d like a cordless immersion blender, some reviewers complain that their top-heaviness makes them awkward.
Benriner mandoline
The classic French model, which cost almost $200 decades ago when I was given it, hangs on my pan rack, rarely if ever used. Instead I reach for my Japanese Benriner mandoline, which cost just over a tenth of that amount.
Mandolines have a blade affixed in the middle of a flat rectangular surface.
Food items
(most often vegetables) are slid repeatedly over the tilted surface to
create uniform slices. The blade adjusts, allowing the cook to control
the slices’ thickness. My family used mandolines for years without
realizing that’s what they were. Sold each year at the Illinois State
Fair, they had a boxy plastic housing and a blade that usually wore out
right before the next fair. We used them for making such things as slaw
and sauerkraut, but especially to cut the kernels from the dozens of
ears of corn we’d freeze.
If
you watch cooking shows, you’ve undoubtedly seen a Benriner in action.
There are other brands, but Benriners is rated best by Consumer Reports and Good Housekeeping, among others. Thekitchn.com says it performed “flawlessly” in their tests.
Benriner
has models of varying widths, some with interchangeable blades. The
basic model costs around $25. Wider versions with more blades go up to
around $90.
Microplane graters
Here’s
another cooking implement familiar to cooking show aficionados. In
fact, Microplanes are so superior to other graters, I’d be surprised to
see any other type in a professional kitchen.
The
first Microplanes were woodworking tools. In 1994 a Canadian housewife
“commandeered” her husband’s favorite rasp when her kitchen grater
broke. She discovered it made the best, lightest, orange zest ever, with
virtually no effort. Word spread quickly. Soon a company making
woodworking tools and surgical instruments morphed, as its website says,
“with just a few modifications and a slight change in our marketing
plan” into one making the world’s most highly regarded kitchen graters.
Why
are Microplanes so much better than ordinary graters? The reason is
that, unlike most graters, whose tined holes are stamped, Microplanes’
ultra-sharp cutting edges are formed by a special chemical process.
My
first Microplane was meant for woodworking. Traditionally, woodworking
tools’ sharp edges face down; the wood is filed for upward strokes.
Kitchen graters are the opposite. I repeatedly skinned my knuckles until
I got the hang of it, only to repeat the process when I got my first
Microplane made for kitchen use.
I
now have several types of Microplanes, but still use the original model
most. It costs around $10-$12; prices go up to around $30 for box
graters.
Camerons stovetop smoker
I initially used my Camerons stovetop smoker a few times, then it
languished on the shelf for a couple years. I don’t remember why – maybe
it was one of those crazy busy times. If so, that’s a shame, because
the stovetop smoker is great for a quick and easy meal. Whatever the
reason, since I tried it again it’s used regularly.
It’s
possible to jury-rig a stovetop smoker with a regular pan or pot, a
rack and a foil tent. It’s also messy and fraught with potential
culinary disaster. Unless your pan is sturdy, it can easily overheat and
be ruined. The stovetop smoker, on the other hand, is perfectly
designed for its purpose. It consists of a heavy rectangular pan with a
ridged bottom. About 2 tablespoons of wood chips (actually more like
sawdust) is placed on the bottom. A drip tray fits on top of that, and
nonstick rack on that. The lid slides onto the pan and seals it shut.
Because it’s sealed, the kitchen smells pleasantly of smoke but not
overpoweringly so. The inside darkens with use, but because it’s OK to
just let it age, much like iron skillet. If the chips are sandwiched in a
piece of folded aluminum foil and the drip pan lineed with foil, only
the nonstick rack needs cleaning.
One
of the best things about the Camerons stovetop smoker is that the
sealed interior means no additional fat is needed, even vegetables, fish
and seafood that require some kind of fat be brushed on when grilling,
sautéing, roasting or smoking. It’s ideal for compensating for holiday
indulgences or just keeping an eye on calories.
There’s
certainly no sacrifice of flavor: I’ve made smoked trout and salmon as
good as or better than high priced versions. Shrimp smoked in the
stovetop smoker are fantastic. They’re a great appetizer, but easy
enough that, paired with a salad, they’ve become an everyday light meal,
whatever the weather.
The
stovetop smoker isn’t just for fish and seafood. I’ve smoked vegetables
such as tomatoes, potatoes, mushrooms and garlic, as well as chicken,
pork chops, sausages, beef and lamb. Lately my husband has used it to
make smoked devilled eggs, chilling shelled hardboiled eggs, then
smoking them for about 20 minutes before halving and filling them.
The
Camerons stovetop smoker doesn’t provide grill marks or the browning/
caramelization that comes with sautéing or grilling. But it’s easy to
quickly brown meats after smoking. Experimenting with the 10 different
chips/sawdust types Camerons’ offers are fun and interesting: alder,
hickory, oak, cherry, bourbon oak, mesquite, apple, corncob, maple and
pecan.
Camerons
stovetop smokers are available in stores and online, including the
company’s website cameronscookware.com. The regular size retails for
around $50 and includes four kinds of chips; a smaller version is also
available with two varieties of chips.
Contact Julianne Glatz at [email protected].
