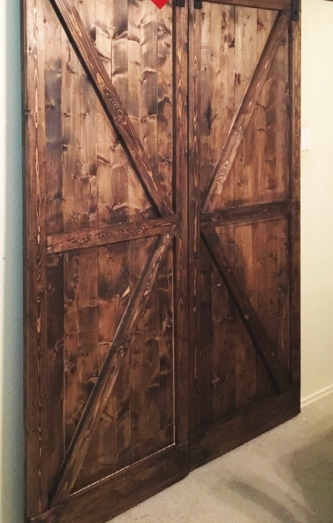
Sliding barn doors separate bedroom, bathroom
One of the things I've never liked about our home is how the master bathroom is open to the bedroom. The counter and two sinks are exposed to the rest of the bedroom, and the toilet and tub/shower are adjacent and separated by a door on the right side. The master closet is also separated by a door on the left side.
Whoever designed our home definitely didn't take into consideration the amount of disrupting light and noise that comes from that little open area. Whoever has to wake up first inevitably will be waking up the other person from just carrying on with their morning routine like brushing teeth. We've resorted to using the flashlight on our cellphones to help keep the noise/ brightness level to a minimum.
Initially, we closed off this area from the rest of the bedroom with a curtain, which helped a little, but didn't look all that great.
Not too long ago, I saw someone advertising their craft of creating unique sliding barn doors. I threw out the idea to my husband in a casual conversation, suggesting that we do this to separate our bathroom from the bedroom, and he felt confident enough to try and make them himself.
Supplies needed for this project are:
Pine wood planks:
10 ........ 1x8x10s
8 .......... 1x3x10s
Wood glue Nail gun with nails Wood stain,walnut color Barn door railing kit. We found ours from Amazon and were able to use our Prime membership for free two-day shipping.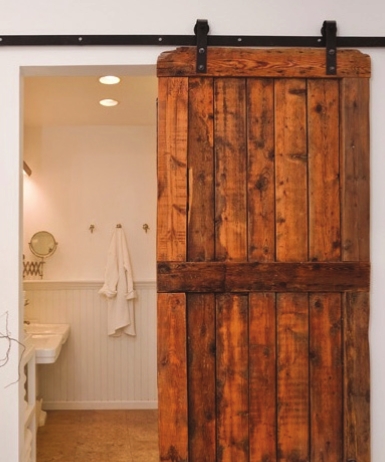
Steps to building your sliding barn doors:
Figure out the length of your opening and cut the boards appropriately using the 1x8x10 planks.
Line the boards together and cut a header for the top and for the bottom using a 1x8x10.
Put the planks together and glue the header board on the top and the bottom. After it has dried, use a nail gun and secure it with the nails.
Measure the size of the openings on the sides of the barn door and cut the 1x 3 x 10 appropriately for trim pieces.
Glue the trim pieces down and nail it with a nail gun.
Using a 1x3x10, measure the opening width of the planks inside the trim to create a center board. Cut, glue and nail down a center board.
Measure diagonal cuts from the corner of the centerboard to the corner of the head board and to the corner of the foot board.
Cut, glue and nail down. Stain the board with desired stain. Install the railing kit per instruction in the package.
In my opinion, the finished product looks so professional and definitely looks better than my original hanging of a curtain to separate the spaces. The barn doors also help block
out light and noise, so it’s perfect for the space we were working with.
This project took about 24 hours to complete because the stain needed
to completely dry, and the level of difficultly is around a 4. A
beginner could easily accomplish this newly trending, popular look.
I
love that this piece was created by my husband and has a story behind
it rather than it just being constructed by a professional at a much
higher cost.
Sara Thomas is Mrs. Fix-it.
She
is originally from Louisiana and is a mother of two, Ryker and Reese.
Her husband, Jason, was born and raised in Texas and very proud of that.
E-mail Sara at [email protected].
